This blog post will help explain the process I went through to create a digital artefact for my DH2001 Concepts and Collaborations module. For one of our assignments we were tasked with creating a digital artefact, it could be anything we wanted as long as it was digitally created. We could work in groups or work by yourself, I chose the latter as I had a very specific idea of what I wanted to do and It was connected to my East Asian religions module which no one else in my class was taking. I knew I had a lot of work to do to get it all done myself, however I was relishing the chance to use the different skills I have learnt in the past year and a half to make my idea a reality. The Idea I had for my digital artefact was based on a topic from my East Asian religions module that I wrote an essay on. The essay was on the yasukuni shrine in Tokyo and the many controversies that surround the shrine. For the digital artefact I wanted to create a simple animation of the grounds of yasukuni, where you control a sprite and move it around the grounds of yasukuni interacting with the different structures and buildings within the grounds. When you move over or walk up to a structure information and images would appear on the screen about that particular structure.
Background Of the Yasukuni Shrine And Its Controversies
Before I get into how I am going to create the artefact I think it is important to give a bit of a background of the yasukuni shrine. The shrine was built in 1869 at the start of the Meiji period when the Imperial forces took back the power of Japan from the Shogunate, returning political power to the Imperial court and the emperor. The shrine was built to honour the souls of all those who fought for the Empire of Japan in the Boshin War (Boshin war, 2017). As Japan fought in more and more wars, more soldiers were enshrined at yasukuni. At the moment there are 2,466,000 souls enshrined at yasukuni (yasukuni shrine, 2017).
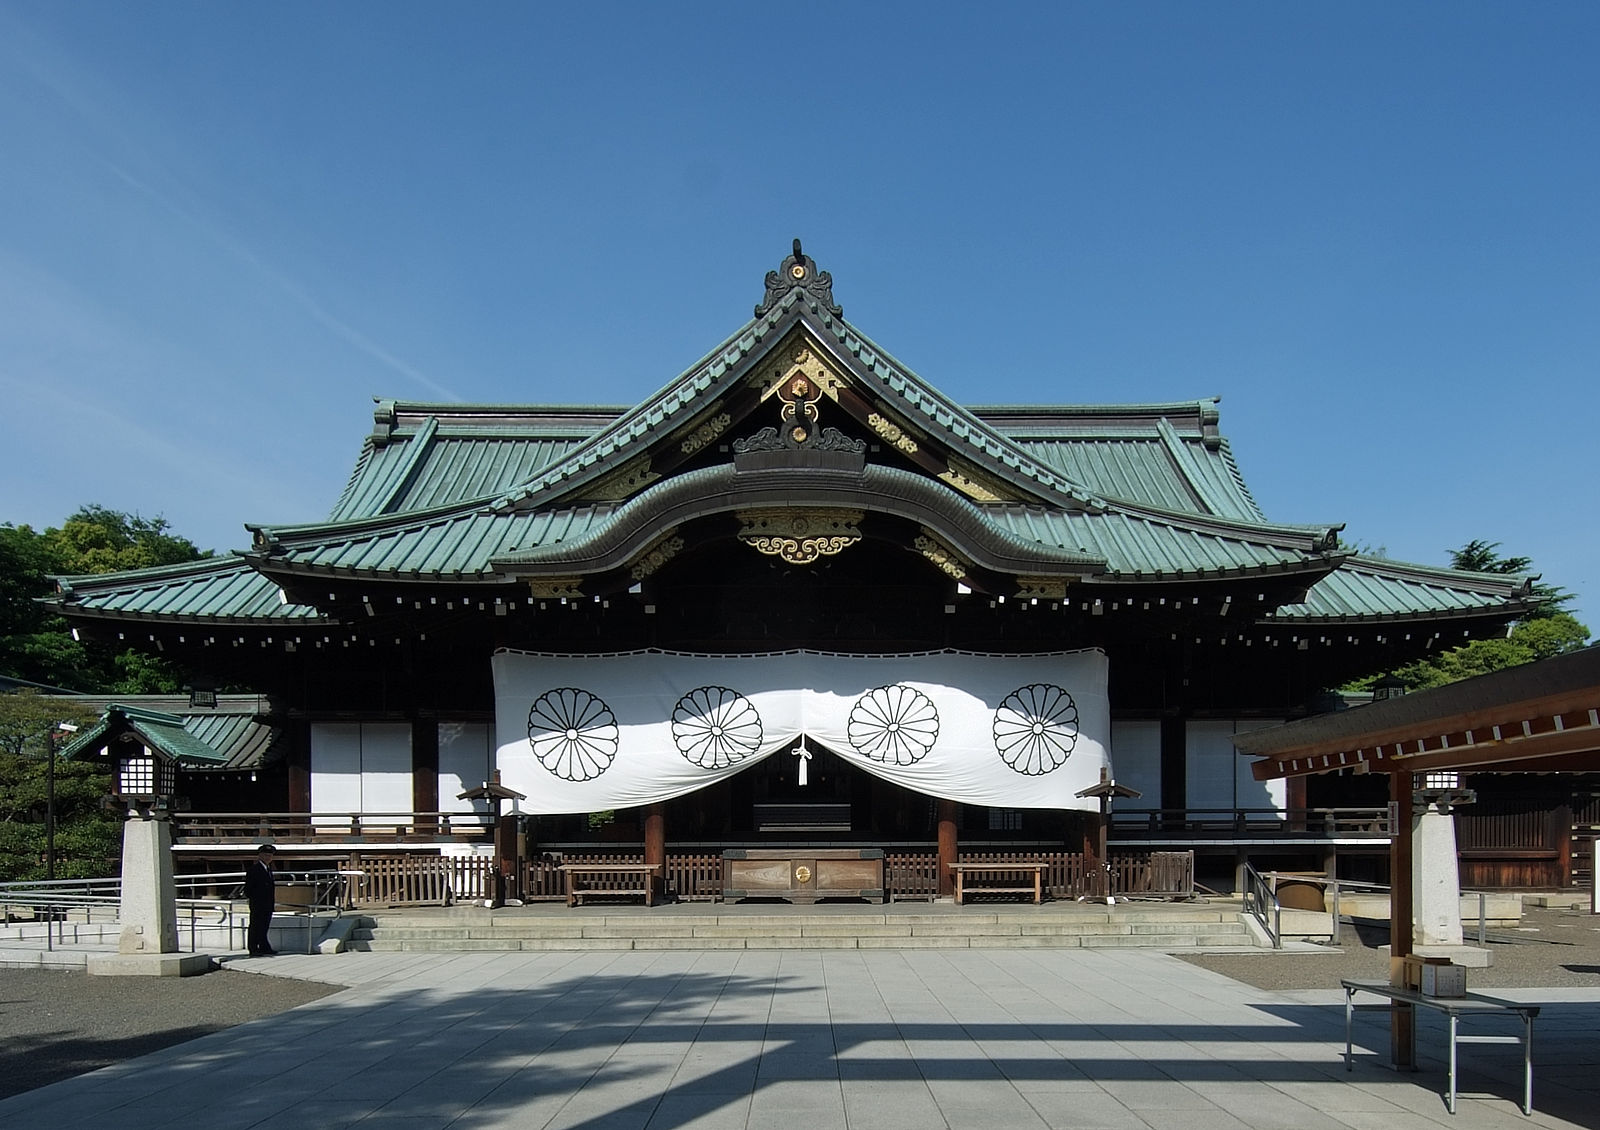
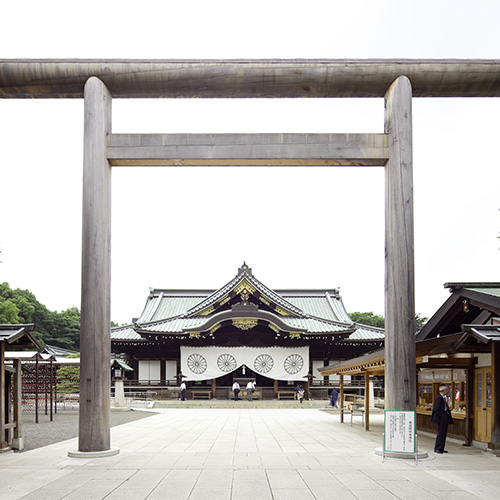
The front of the Yasukuni Shrine
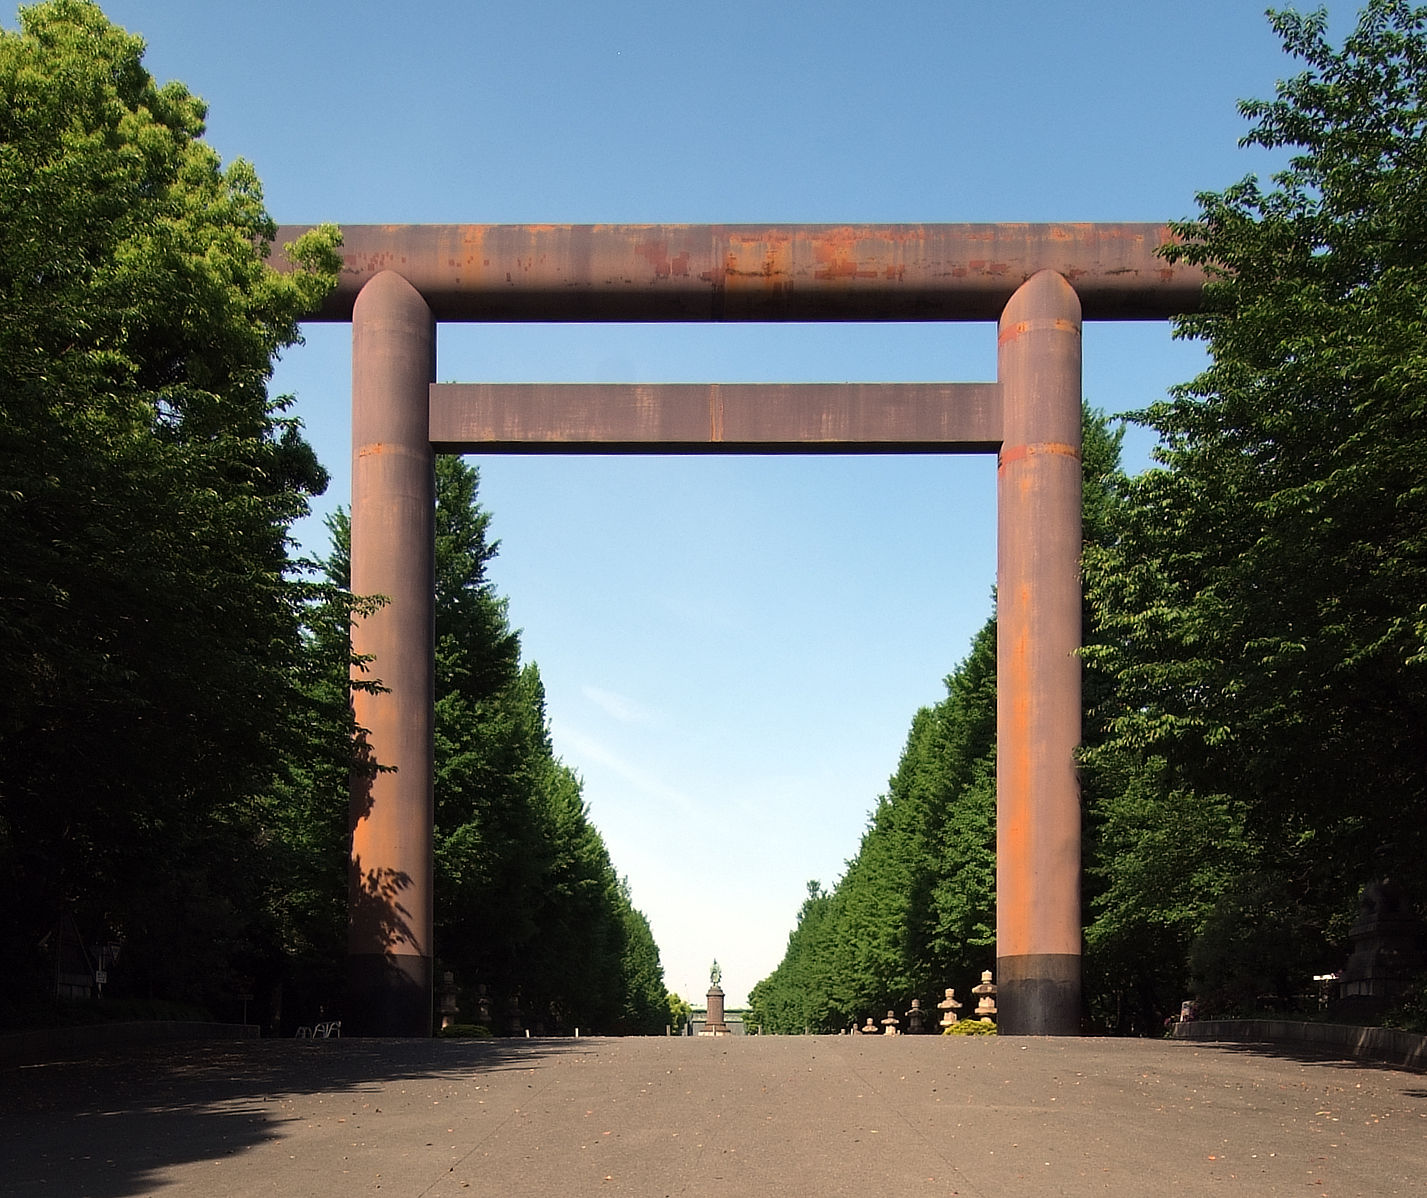
The Tori gate leading up to the shrine
Most of the controversies that surround yasukuni stem from the actions post WWII. The separation between religion and state put yasukuni in an awkward position as it always had strong state and military support. The enshrinement of over 1000 war criminals, of which 14 were deemed Class A war criminals upset a lot of people in Japan and Japan’s neighbouring countries who see the act of honouring these war criminals as not taking responsibility for their actions in WWII (Breen, 2008). This problem keeps cropping up as various Japanese Prime Ministers have visited the shrine to pay their respects, creating international backlash with regard to the enshrined war criminals and the ignoring of Article 20 regarding the separation of religion and state (Nelson, 2003). Apart from the controversies, the yasukuni grounds are beautiful and many events take place there throughout the year, from sumo wrestling, to flea markets to the annual spring and autumn festivals.
The Steps Involved In Creating This Digital Artefact
So now you know the background, I will outline the different steps that were involved in creating the animated interactive map of yasukuni. I broke the process into 4 main parts, the first was using Photoshop to create all the buildings, the sprite and the map of yasukuni, the second was using processing and Java programming to display the animations and make them interact with each other, the third was to record my own interpretation of one of an old Japanese patriotic songs that is sometimes sung at yasukuni, and the fourth was to implement everything into a webpage that I could put up on my website. I was pretty confident of getting the animations and the music recording done but the coding and implementing it on my website were areas I could see problems arising.
Animating The Map
The first part in creating this digital artefact was to make the animations of the sprite, the map and the buildings in the grounds of yasukuni. There was no way I could animated every single building or structure in yasukuni for this project, so I stuck with the main ones. Using Photoshop, I started on the map creating the simple larger areas first like the pathways, roads, grass and path edges. After that I created the grass, trees and cherry blossoms, it seemed to be using a lot of processing power on my computer. It created a lot of separate layers and made the file quite large which slowed down the computer a bit. Once I had created a piece of grass I would have to duplicate it many times then merge them into one rectangular area of grass to keep the number of layers down. Once I had the grass and trees duplicated and in position it was time to start on the structures, which I worked on in a separate file as the main one was getting slower and more processor intensive. The Torii gates were simple enough to create using different sized rounded rectangular shapes and merging them together and measuring them against the areas of the map to make sure they were the right size. The buildings were difficult to get right as the Japanese shrines have great detail and their roofs are multi layered and a weird shape. The roofs could be better and more detailed but using a free hand draw tool the best I could do is what is there now. The sprite was easy enough to create but is not very detailed, I was going to make him with moving limbs but decided I would not have the time with everything else I had to do. That could be a job for the future as I work on making it more engaging and visually pleasing. Once I had all the animations created and size properly, it was time to export them out of Photoshop as jpg and png files and have them ready to be loaded into Processing.
Creating the Interaction and Coding
I wanted to use Processing for this digital artefact because we had been studying it in our Authoring module and I wanted to put my new found skills to the test. There is a few projects I can see myself using processing in the future and wanted to see how it worked when using it with other programs and files. For the most part it was easy to create the audio and image files. Processing is where most of the work was done, it is here where everything would come together and work in sync. Before I loaded in all the animations I wanted to make sure I could get a sprite to move, constrain it to the display, interact with object and when it did interact information would come up on the screen.
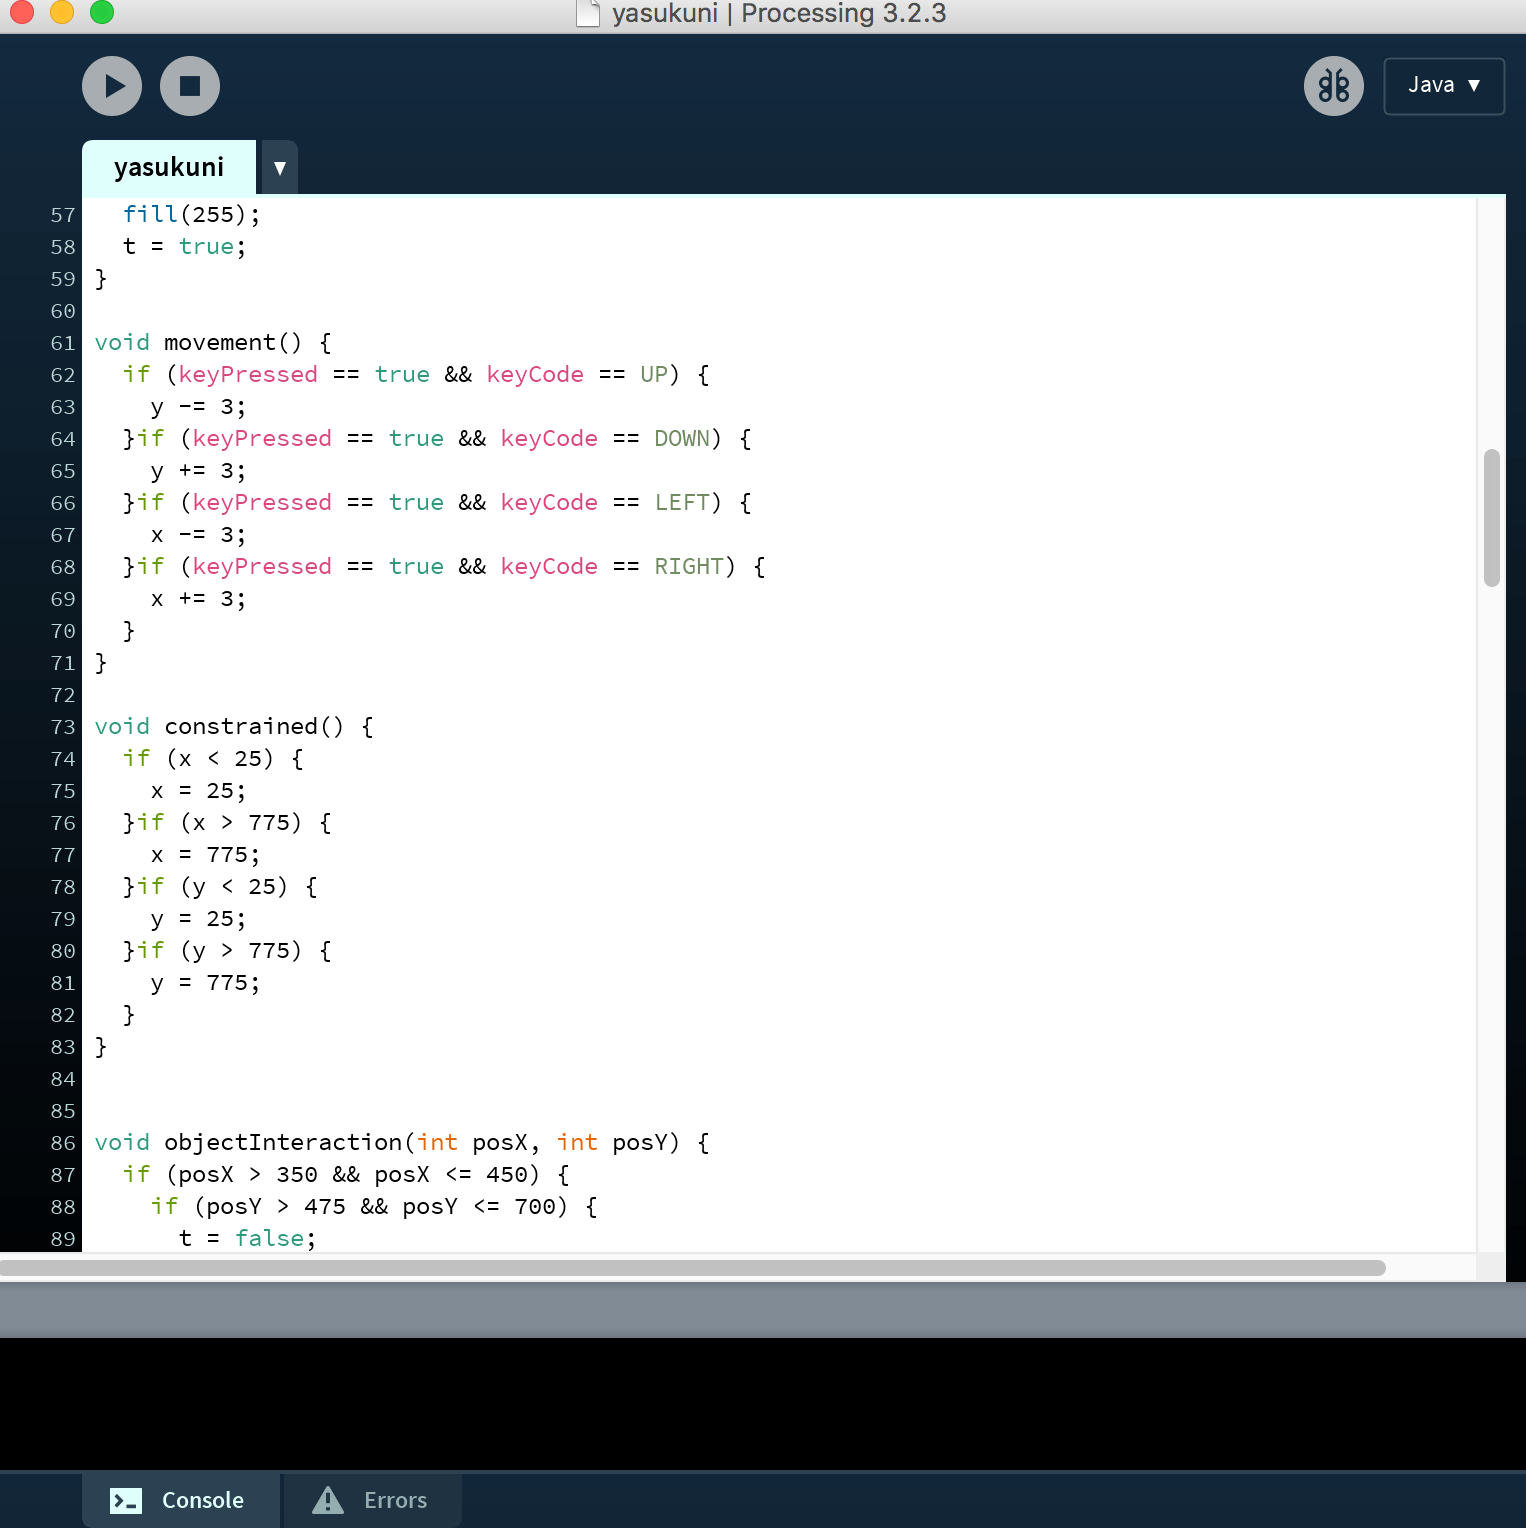
Processing code snippet for the interactive game
Once it got basic code of these parts done I began building the map. Originally I wanted to have all the buildings added separately and use some sort of collision detection to stop the sprite walking over the building. Unfortunately I couldn’t get it to work properly and had to drop it from this version of the artefact. So the only structures that were loaded up separately from the background map was the 3 gates and the sprite of course as I need the sprite to walk under the gates. To constrain the sprite to the display I wrote the function constrained() and told the program if the x and y positions go beyond the canvas size to move him to x or y position of the edge. Then I called the function in the main draw() function along with two other functions called movement() and objectInteraction(), these were the main parts of my program. the movement() function was simple enough, stating that if a key was pressed and if the key was either arrow Up, Down, Right or Left add or subtract 3 from the y position for Up and Down and add or subtract 3 from the x position for Right and Left. The objectInteraction() function had a lot of code and was in charge of checking if the x and y positions of the sprite were in the vicinity of a specific structure and if so it would display the string with the information and an image of the structure on the canvas to the right of the map. All the images had to be loaded into the sketch and the formatting of text was done manually to be positioned in the right place. If I was going to improve the program I would look into other ways of getting the relevant information and extracting and formatting it automatically. The next part of the project was to create some atmospheric music relevant to the subject matter to play as you explore the grounds.
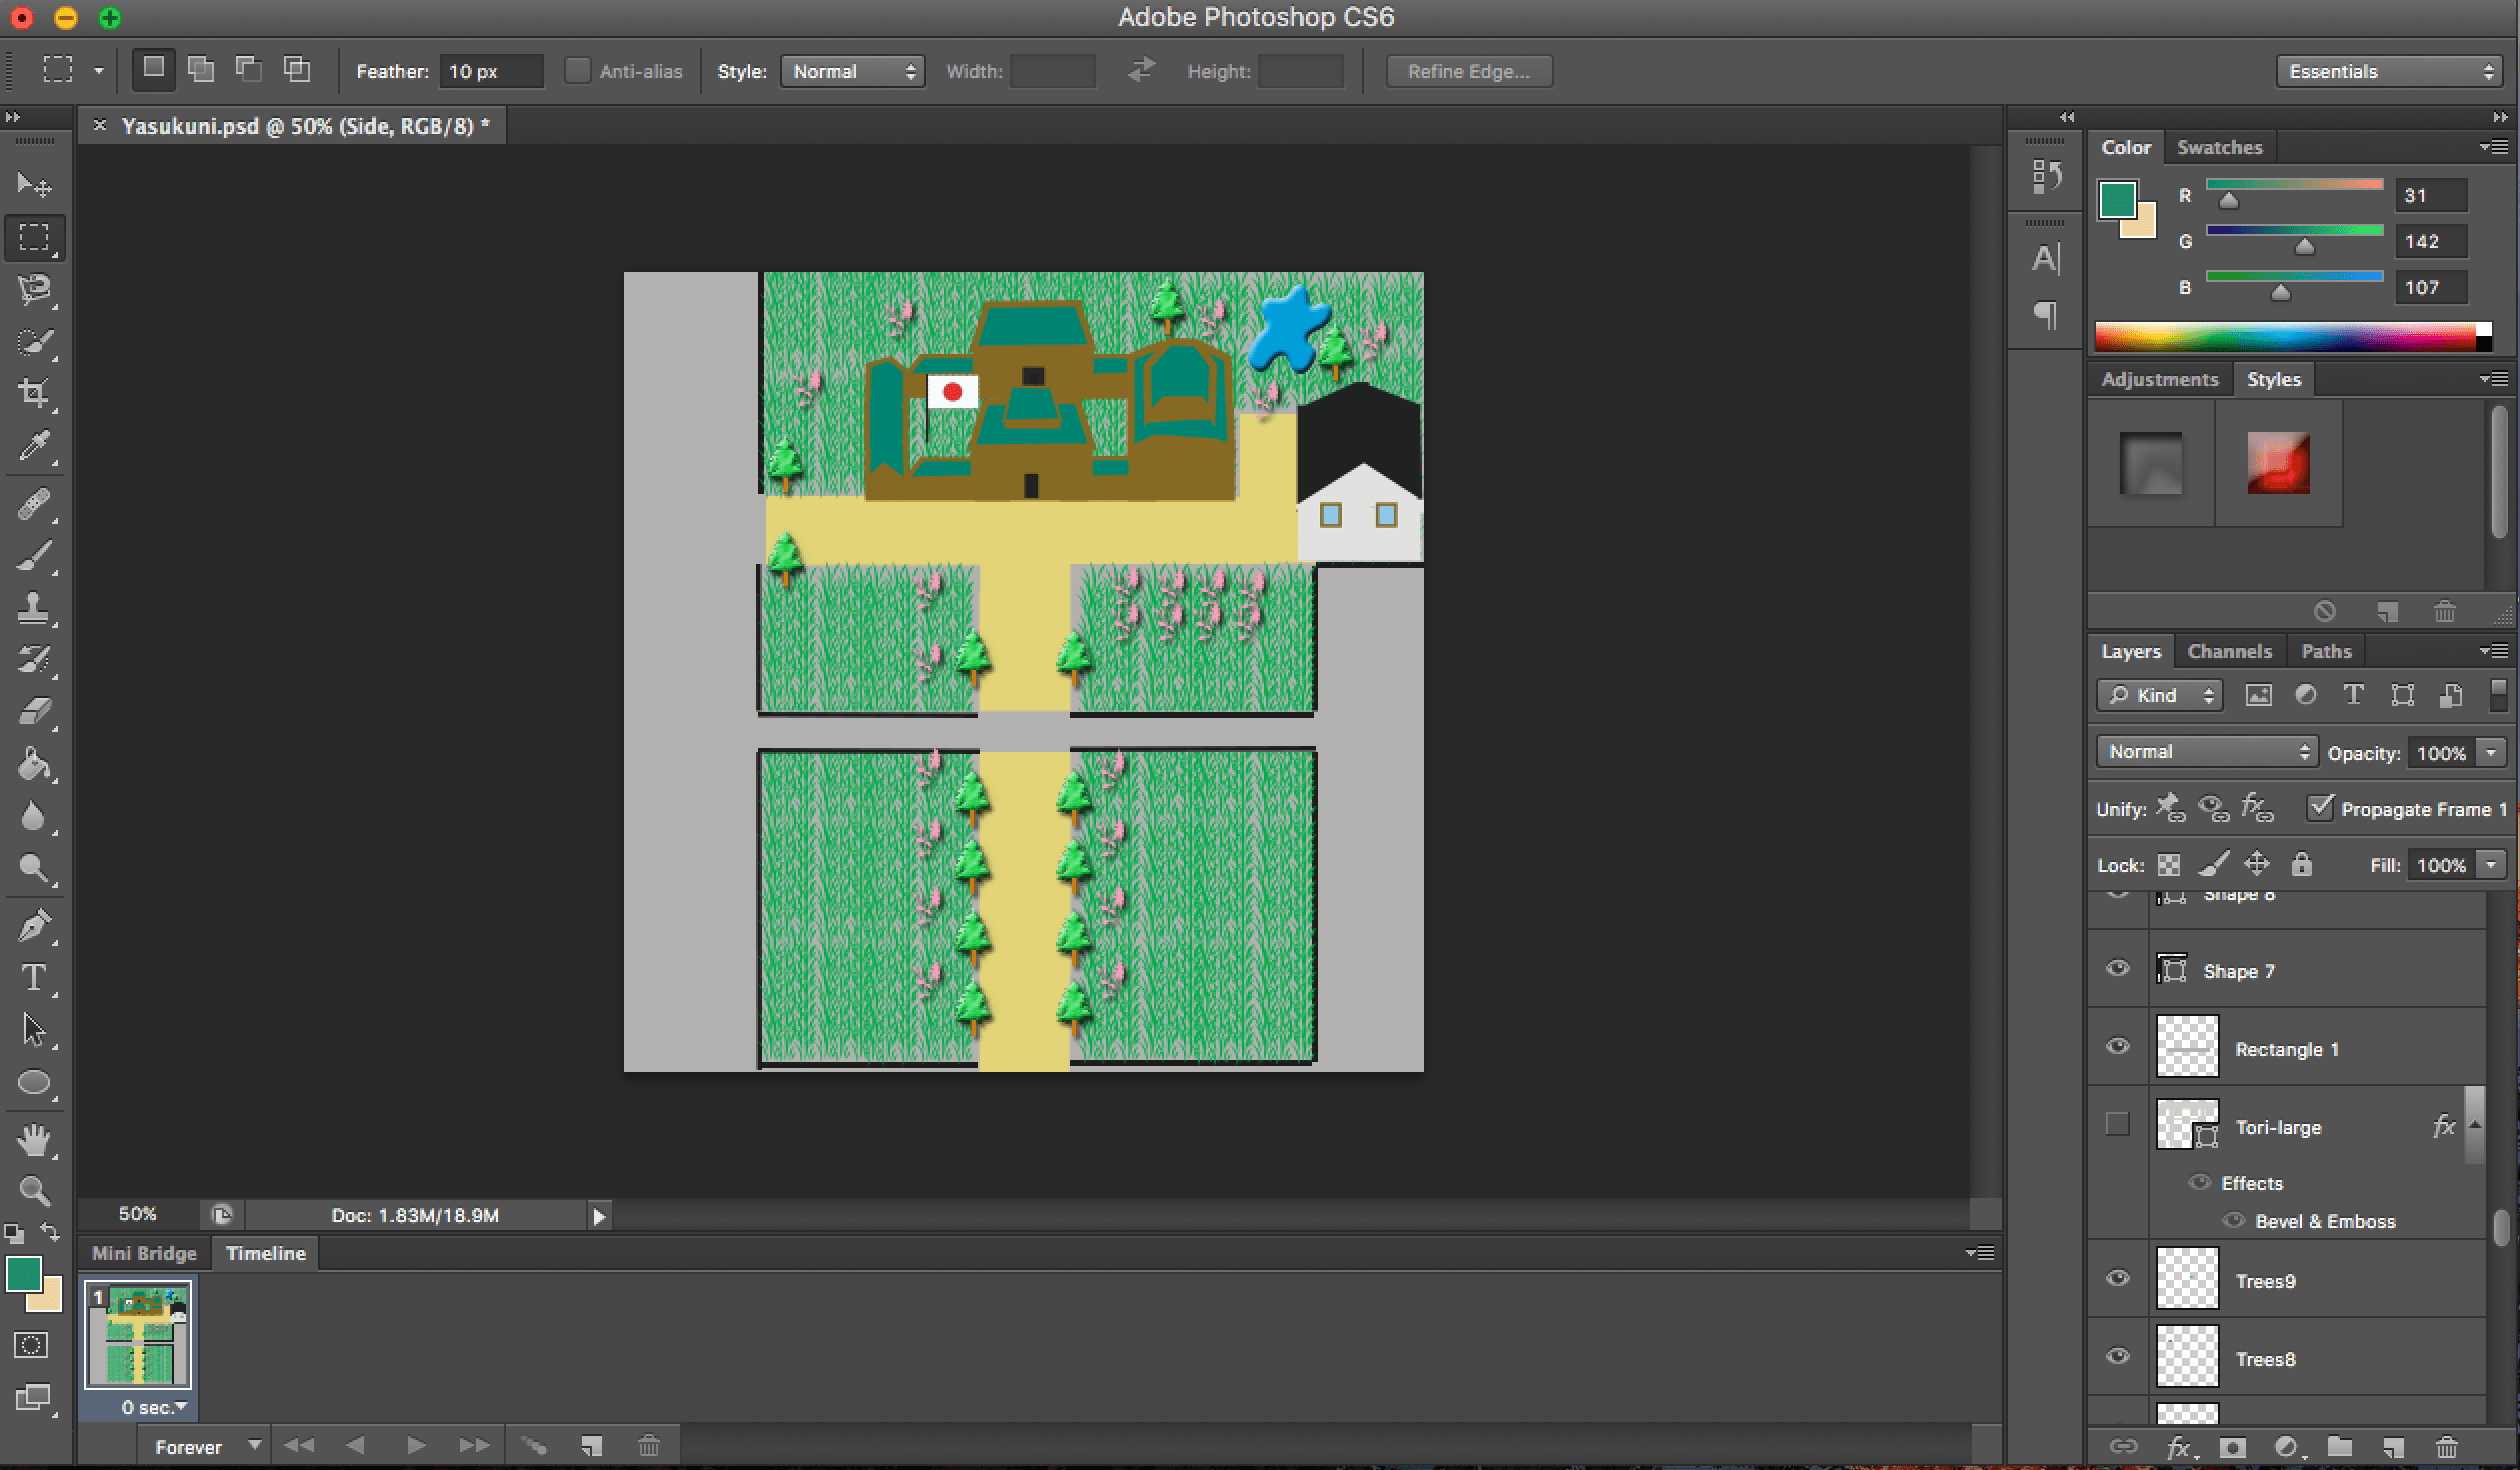
Designing the animated ground of the shrine in Photoshop
Recording The Music
Music recording is the one area I have a lot of experience in. Having recorded with many bands I have been in and record friends of mine’s projects, I have gained a lot of knowledge in this area. I have been using Pro Tools for about 8 years now so I decided to use this software to record a slower more atmospheric version of an old Japanese song called Yuki No Shingun written in 1895 by Nagai Kenshi.
I asked my friend and fellow member of The Followers of Otis, Eoin Dolan to help me track the recording as I needed someone on the desk while I recorded the music. I had picked out the melody for the old song and slowed it down and decided to perform it on an acoustic guitar using a pair of Octava mk 102 stereo mic and an AKG c214 mic. It was recorded to about 80 bpm using a metronome and after the guitar was put down we experimented with using a MIDI keyboard loading in different sounds from asian like a zither and a fue (which is a traditional flute). We recorded two tracks of the zither playing around with the melody of the guitar and than recorded a drone track of the fue in the background to create more of an atmosphere. Then we mixed the track adjusting levels, adding compression, adding reverb and EQing the guitar track and mixed it down to an mp3 file. The next step was to add the audio to the processing sketch. To do this I had to import a sound library into my sketch and load in the sound file, there was one problem though …. it would only play mono recordings for some reason. So I had to go back into Pro Tools and mix it down to be a mono track, once that was done it played fine and I set it up to play on a loop when the program started. Everything was coming together, now could I get it to play on a web page.
Implementing It On The Web
The final stage in creating my digital artefact was to get to program working on my website. I created a basic html page and the standard tags to get a blank page to display and tested on my localhost. From reading the tutorials on the processing website and looking at how others had used processing with html, I knew I needed a file call processing.js to interpret the processing file to work with the web and a piece of code that points to the processing file in the body of the HTML document. Once I had these and all the files used in the processing sketch in the same place I tested it again with the local host. There was a few bugs that appeared that I needed to sort out right away. The placement of some text and images were slightly different then what was on the processing sketch and the audio would not play at all. The text and image placement was simple to fix but I could not find a way to fix the audio to play within the processing sketch. So to get the audio file to play I had to load it into the html page using HTML 5 and got it to autoplay and loop on start up. This was a good fix for what I needed the audio for, however if I needed the audio to change or start on an interaction within the processing sketch this method would not work. The audio problem is something I will have to research more to find out how I can get it to run within the sketch. After fixing the small bugs and writing some meta information into the HTML head tag and creating a home link and a link to this blog post all that was needed was to upload all the files to my website’s public html page. Once they were all loaded up I tested it on different computers, mac’s and pc’s to see if it worked fine on different systems and it did. In my opinion it works better on bigger screens as you don’t have to scroll down to where the sprite starts from. I was glad to get the artefact working on my site but I think there is still some work I can do on the web page to make it more visually pleasing.
Conclusion
To conclude, I found the process of creating this digital artefact very enjoyable and I learnt a lot of new skills in different areas especially using processing, javascript files and HTML 5 to create interactive websites. The topic of the yasukuni shrine and its controversies is one that stood out in my East Asian religion module and one I was interested to learn more about, so this was a good way to further my interest in the topic and learn more about the different structures and their purpose within the shrine grounds. I think I would like to continue improving this project, when I learn new skills or find better resolutions to parts of the project I will update the project accordingly. Once I have this project up to a certain standard I would like to use it as a template to make more animated interactive maps of other important and interesting structures around the world. I hope you enjoy the artefact and any feedback you have would be greatly welcome.
Image and Video Sources (for this blog post and images used in digital artefact):
- File: Yasukuni shrine Daiichi Torii 2010.jpg – Wikimedia commons (2010) Available at: https://commons.wikimedia.org/wiki/File:Yasukuni_Shrine_Daiichi_Torii_2010.jpg (Accessed: 12 January 2017).
- File: Yasukuni shrine Daini Torii 2010.jpg – Wikimedia commons (2010) Available at: https://commons.wikimedia.org/wiki/File:Yasukuni_Shrine_Daini_Torii_2010.jpg (Accessed: 12 January 2017).
- File: Yasukuni shrine Sinmon 2010.jpg – Wikimedia commons (2010) Available at: https://commons.wikimedia.org/wiki/File:Yasukuni_Shrine_Sinmon_2010.jpg (Accessed: 12 January 2017).
- File: Yasukuni shrine 201005.jpg – Wikimedia commons (2010) Available at: https://commons.wikimedia.org/wiki/File:Yasukuni_Shrine_201005.jpg (Accessed: 12 January 2017).
- File: YushukanMuseum.JPG – Wikimedia commons (2006) Available at: https://commons.wikimedia.org/wiki/File:YushukanMuseum.JPG (Accessed: 12 January 2017).
- File: Yasukuni Jinja1a.jpg – Wikimedia commons (2008) Available at: https://commons.wikimedia.org/wiki/File:Yasukuni_Jinja1a.jpg (Accessed: 12 January 2017).
- File: Laika ac Yasukuni shrine (7478706578).jpg – Wikimedia commons (2012) Available at: https://commons.wikimedia.org/wiki/File:Laika_ac_Yasukuni_Shrine_(7478706578).jpg (Accessed: 12 January 2017).
- File: Yasukuni Mitama night.JPG – Wikimedia commons (2008) Available at: https://commons.wikimedia.org/wiki/File:Yasukuni_Mitama_Night.JPG (Accessed: 12 January 2017).
- NeuPommern (2016) Japanese patriotic song- 雪の進軍 [Yuki no Shingun]. Available at: https://youtu.be/UEA2sS2Os3Y (Accessed: 12 January 2017).
- Sakura Matsuri @ Yasukuni shrine (2017) Available at: https://www.flickr.com/photos/o_0/13507507093 (Accessed: 12 January 2017).
.jpg)
References:
- Boshin war (2017) in Wikipedia. Available at: https://en.wikipedia.org/wiki/Boshin_War (Accessed: 12 January 2017).
- Breen, J. (ed.) (2008) Yasukuni, the war dead and the struggle for Japan’s past. New York: Columbia University Press. Chamaecyparis obtusa (2016) in Wikipedia. Available at: https://en.wikipedia.org/wiki/Chamaecyparis_obtusa (Accessed: 12 January 2017).
- Nelson, J. (2003) “Social memory as ritual practice: Commemorating spirits of the military dead at Yasukuni Shinto shrine”, The Journal of Asian Studies, 62(02), pp. 443–467. doi: 10.2307/3096245.
- Torii (2016) in Wikipedia. Available at: https://en.wikipedia.org/wiki/Torii (Accessed: 12 January 2017).
- Yasukuni shrine (2017) in Wikipedia. Available at: https://en.wikipedia.org/wiki/Yasukuni_Shrine (Accessed: 12 January 2017).
- Yūshūkan (2016) Available at: https://en.wikipedia.org/wiki/Yūshūkan (Accessed: 12 January 2017).
Leave a Reply